How To Change A Cloth Nappy Like A Pro
This cloth nappy guide will walk you through our pro tips for how to change a nappy for your little one.
When you’ve never changed a nappy before, the fear of the unknown can bring on feelings of fear and anxiety.
Even those who have mastered changing a disposable nappy for their baby, changing a reusable nappy is a whole different ballgame.
This comprehensive guide will cover:
- How to change a nappy step-by-step [with video]
- How to change a nappy with pictures
- How to prep the nappy correctly
- How many nappies do I need
- Where is best for changing a nappy
- How often should a nappy be changed
- How long can you leave a wet nappy on?
- Is it best to change a nappy before or after feed?
- Checklist for achieving the perfect fit
- The main differences between disposable nappy and cloth nappy fits
- Red marks: what’s okay and what’s not
- Tips for older babies who like to roll
How do you change a nappy step-by-step [with video]
Let's get straight into the visual: watch this quick video to see how to change a nappy:
Step 1: Lay baby on the changing pad and undress them from the tummy down. Remove the dirty nappy and set aside, gently wipe down baby’s genitals and bum with a reusable bamboo cloth wipes. By gently holding baby’s feet or legs, lift their bum slightly and slide the back of the cloth nappy underneath, ensuring that it doesn’t sit too high up their back. Rest baby’s bum back down on top of the nappy.
Step 2: Bring the front of the nappy up through baby’s legs.
Step 3: Gently pull one side of the nappy around baby’s tummy, grip the back side of the nappy and pull this over to secure the hip snap. Now secure the tummy snaps.
Step 4: Repeat the same on the other side, ensuring that the tummy isn’t too tight.
Step 5: Gently squeeze the centre of the nappy to create a taco and help ensure that the leg elastics sit inside baby’s groin - not on their thighs. Next, run your finger around the leg elastics to further bring them into the groin area - elastics sitting on baby’s thighs can cause discomfort and leaks.
Step 6: ensure any excess fabric is tucked inwards and upwards.
Ta-da - you have successfully changed a cloth nappy for your baby.
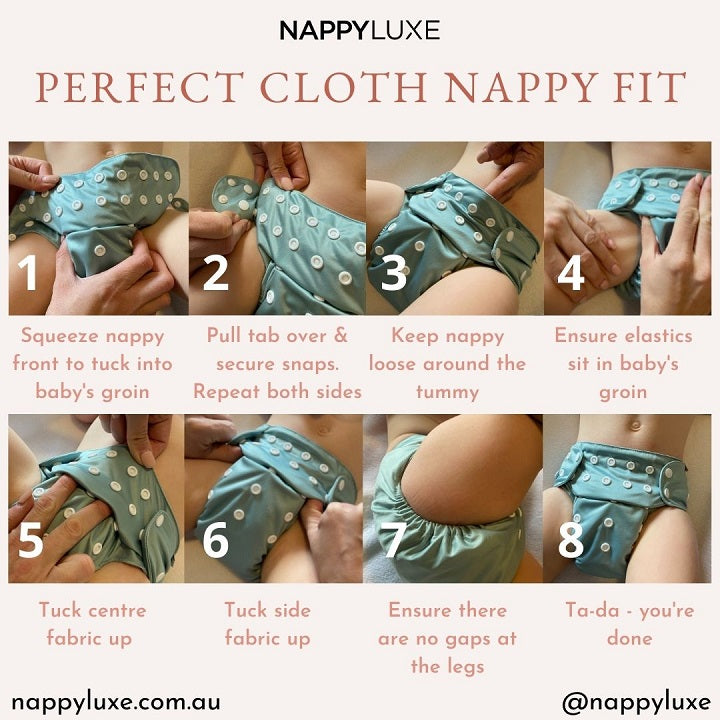
How to change a nappy with pictures
Below is our handy image which you can download and save to refer back to:
How to prep the nappy correctly
We'll now rewind a few steps, changing the nappy first requires good preparation.
As the old saying goes: if you fail to prepare then you prepare to fail.
The last thing you want is to be attempting to assemble a cloth nappy one-handed when you’ve already removed the dirty one, with the other hand holding baby trying to keep the poo from going everywhere.
Baby is crying and you’re feeling the stress.
This is why we suggest preparing your cloth nappies in advance.
NappyLuxe cloth nappies separate into 3 parts: the nappy cover, a large insert and a small insert (also called a booster).
These elements are taken apart for washing then snapped back together once dry, ready to be used again on baby.
The nappies require washing before first use, so they’ll need to be reassembled.
There are a few ways you can do this, but we recommend snapping the large insert onto the cover first using the snaps at both ends.
You can then snap the small insert on to the large insert.
You will also need to adjust the rise snaps at the front of the nappy to ensure the size is set appropriately depending on the size, weight and shape of your little one.
Pro tip: once you have the rise snaps set, you don’t need to unsnap these for each wash, leave them as is until your baby grows larger and you’re ready to adjust to the next size setting.
Finally, make sure you have enough nappies prepared to keep you going for a few days at a time.
You may choose to prepare one day’s worth of nappies at a time each evening, but most find doing several day’s worth of nappies at once works well.
It depends on how many nappies you have in your stash.
If you’re unsure how many nappies is the right amount, check out our post: how many nappies do I really need?
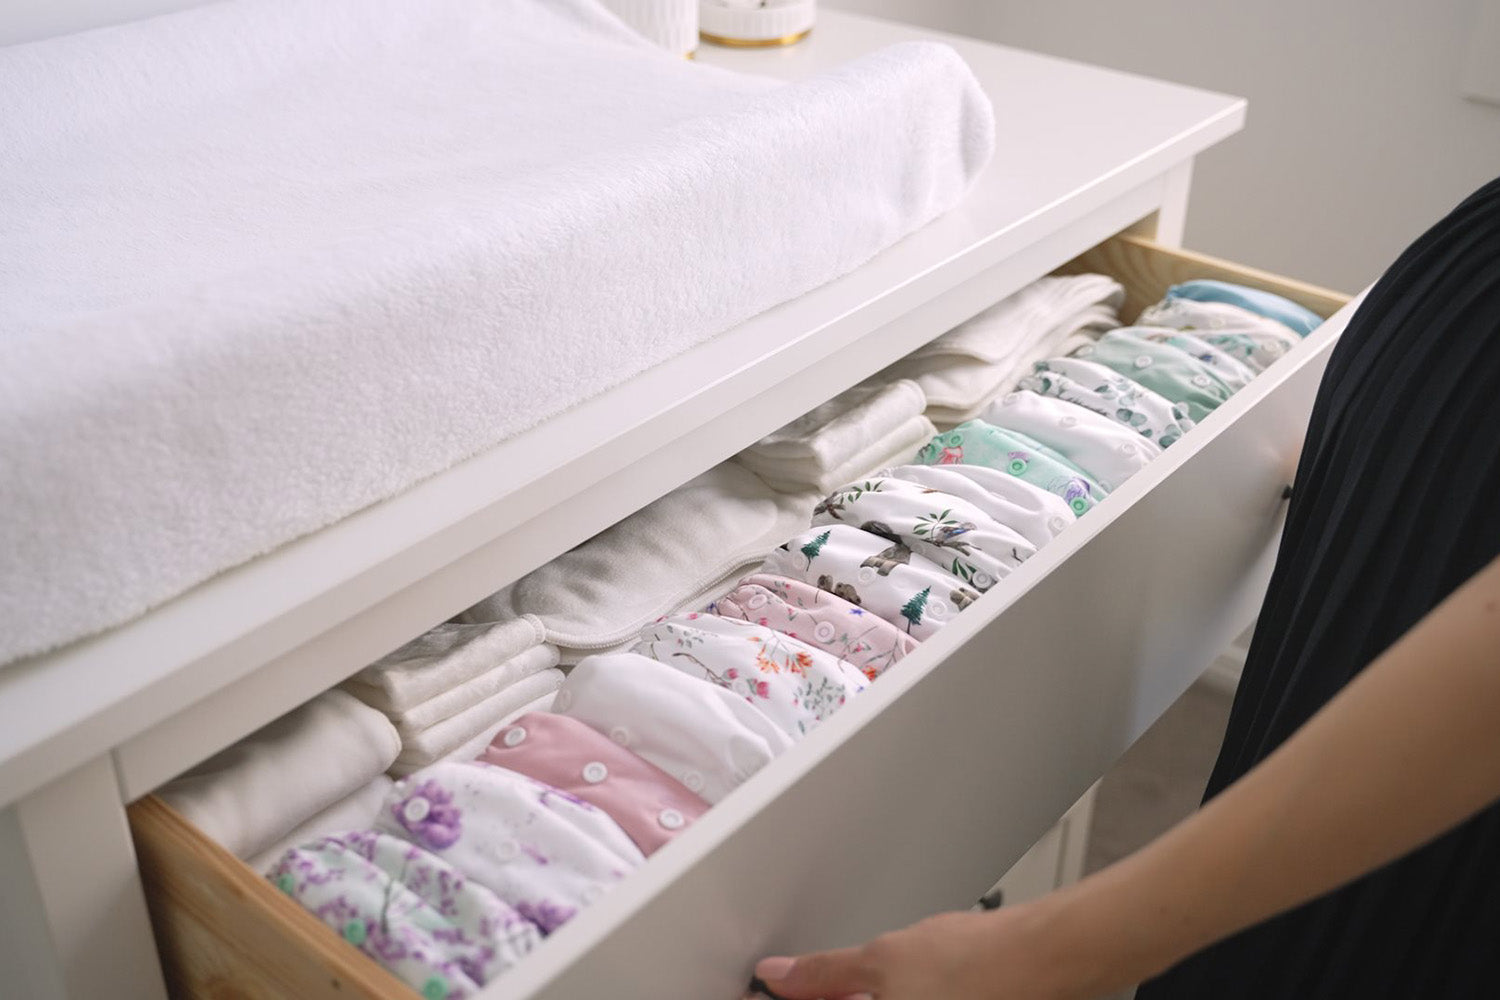
Where is best for changing a nappy
As part of the nesting phase before baby arrives, it’s likely you already have a changing area setup and ready for your bundle of joy.
The nursery makes a great place for setting up a changing table, with shelves or drawers to store nappies, bamboo cloth wipes, nappy cream, and other essentials.
However, there’s really no right or wrong place for changing a nappy.
That’s why we love the Deluxe Felt Caddy by Nappy Caddy Co, to arm you with changing essentials anywhere in the home.
Simply place 4 - 8 nappies inside, some cloth wipes, a spray bottle of water to dampen the wipes, nappy cream, and away you go.
This works well for larger homes with multiple levels, to save you trips back and forth from the change table.
A changing pad can easily be tucked away under a bed or couch, alternatively our portable changing mats provide a soft and hygienic surface to change nappies wherever, whenever.
Many choose to change nappies on a bed, a play mat, the floor, and so on.
When out of the house, many restaurants, cafes and shopping centres in Australia have good facilities with change tables.
In this instance, simply lay down your portable changing mat and place any dirty cloth nappies into a wet bag to bring them home with you for washing.
During picnics and park catch ups with other Mums, your portable changing mat can be laid out on the grass or a picnic rug in a shady spot.
How often should a nappy be changed
With all types of nappies, both disposable and cloth, a nappy should be changed every two - three hours max during the day.
This helps to ensure that baby doesn’t develop nappy rash from prolonged exposure to urine against their delicate skin.
At night-time, it’s generally considered fine to leave the nappy on for longer, providing you’ve added enough absorbency to your cloth nappy.
Check out our post about night nappies: how to use them correctly with cloth, for more information about night nappies.
An exception to the 2 - 3 hour rule is if your baby has done a poo in their nappy, in which case the nappy should be changed as soon as possible.
Many newborn babies poo multiple times per day, especially when breastfed, as breastmilk is a natural laxative.
This is why they can get through around 10 nappies a day, comparative to older babies who get through around 6 nappies a day.
How long can you leave a wet nappy on?
Wet nappies need to be changed every two to three hours.
Some parents may be temped to stretch this out to longer for ease, but this can really backfire with leaks or nappy rash.
If your baby has sensitive skin and the nappy is wet sooner than the two - three hour mark, there’s nothing to stop you changing it even more frequently to achieve maximum comfort for your baby.
For overnight use, it’s okay to leave a wet nappy on for longer (up to 12 hours overnight).
Because this is the one exception in a 24 hour space, leaving a wet nappy on for this long is unlikely to case nappy rash.
Plus, as babies grow, they begin to wee less and less at night.
If a baby has soiled (done a poo) in their nappy, it needs to be changed as soon as possible.
Is it best to change a nappy before or after feed?
This will vary depending on the age and stage your baby is at.
Exclusively breastfed newborns often poo each time they feed, in which case changing the nappy after the feed provides the most efficiency.
Newborns also tend to feed for a long time, so you might find it works best to change the nappy both before and after the feed.
Bear in mind that a nappy change is usually something that wakes baby up and stimulates them.
Therefore if you know that they’ll fall asleep feeding, then a nappy change before the feed will work best to avoid disturbing your sleeping baby.
Checklist for achieving the perfect fit
So you’ve got the hang of changing a nappy, next it’s time to start perfecting your fit.
By having a perfect fitting cloth nappy, you ensure your baby is happy, comfortable, and that the nappy isn’t leaking.
This starts with the correct rise snap setting as covered earlier in this guide.
An incorrectly sized nappy can be difficult to fit and can cause leaks, for example, if the nappy is set to a large size and placed on a very small and young baby.
The nappy being sized correctly helps to ensure the inserts sit directly against baby’s urine stream and absorb the liquid as soon as possible.
If the nappy is sized incorrectly and the inserts aren’t quite flush against baby, the liquid can run straight to the edges of the nappy and cause leaks out through the stitching before it has a chance to be absorbed by the inserts.
Being confident you’ve got the right size setting is the first item to tick off your check list.
The next item is excess fabric - you typically see excess fabric appear when the nappy is set to a small setting for a smaller baby - you need to push this excess fabric inwards and upwards to tuck it out the way.
Next, ensure no insert material is poking out, it must all sit inside the nappy to ensure that moisture doesn’t wick onto your baby’s clothing.
Now you need to ensure the tummy isn’t done up too tight, check that you’re able to fit two stacked fingers down the front of the nappy.
When baby is learning to sit up, you may find they need even more space at the front to enable them to sit comfortably - keep an eye on their sitting posture and adjust as required.
Next, check the leg elastics. They should sit flush against baby’s skin with no gaps at all, but without being overly tight.
If you’re struggling with gaps appearing in this area, it is usually a sign that the rise snaps need to be adjusted to a smaller nappy setting.
If you’re finding you have a good fit around the tummy but the leg elastics are too tight, you can try leaving the hip snaps undone.
You can also tweak the snaps to sit at an angle if needed, they don’t need to be symmetrical.
Finally for your checklist, turn baby over to lay on their tummy and check the back elastic isn’t sitting too high or too low - around 1 cm above the top of their bum crack is about right.
The differences between changing a cloth nappy vs a disposable nappy
If you’re used to changing a nappy that’s disposable, there are a few differences to note when using cloth.
The main differences can be described as granny pants vs bikini briefs.
Disposable nappies fit similarly to granny pants: they are large and all encompassing, they sit high up the back and high around baby’s waist, and are fastened tightly around the waist. The leg elastics sit low around the thighs, and finally, the excess plastic fabric is designed to be tucked out.
Cloth nappies fit similarly to bikini briefs: they sit low just above the bum crack and at the front they sit under the belly button. Around the legs, the elastics are designed to be tucked right into the groin and should not around the thighs. Finally, excess fabric needs to be tucked inwards and upwards.
These are the main differences between changing a nappy that’s disposable vs cloth.
Red marks when changing a nappy: what’s okay and what’s not
Cloth nappies contain elastics and therefore some red marks on baby’s skin are inevitable, much like the marks that socks or bras leave on our skin.
For those who are new to using cloth nappies, it can be difficult to ascertain what red marks are okay and what ones are cause for alarm.
A good test is to get baby in the bath for bath time and see if the marks are faded and almost gone by the end of the bath
If the marks are still red and angry looking, this is a sign that something isn’t quite right.
Read our blog about how to avoid red marks from cloth nappies for more information about identifying what’s wrong and fixing the issue.
Changing a nappy for older babies who like to roll
We all know the excitement of when your baby starts to reach her first milestones.
When your baby learns to roll, they might then start practicing their new found skill at every waking moment.
Or they might give you a bit more grace period before they start making nappy changes seriously challenging for you.
But the facts are, at some point, changing a nappy will become about as easy as trying to get a crocodile into a jacket.
When you hit this challenge, don’t despair, we’ve got some tips to bring peace and tranquility once more to nappy changes.
Most importantly, we want to keep baby from rolling poo everywhere.
Here are our handy tips
- The forbidden item - try giving your baby a forbidden item to play with that they aren’t usually allowed. Ideas include your car keys, the TV remote, a random spatula from the kitchen, the list goes on. The trick here is timing - make sure you give the item to baby exactly as you’re laying them down for the nappy change. Too early and they might get bored, throw the item on the floor, and continue trying to roll away. Too late and they’re already rolling away before the item has caught their attention.
- The sing song - if you’re the type to always sing and dance to your baby then this might not be the method for you, as baby won’t be entertained by the same entertainment they always see. But, if you haven’t tried it before then it’s worth an attempt. Make silly noises, silly faces, peekaboo, anything to make them giggle and keep their attention on you rather than rolling away.
- Provide a snack - whilst we don’t recommend giving them anything they could choke on, if your baby is well established eating foods then you can use your discretion to give them a suitable snack to distract them.
- The happy baby song - last but definitely not least, try playing baby a catchy tune on your phone, crank up the volume to provide the perfect distraction.
- The Wrigglebum - we saved the best one until last, the Wrigglebum. This is a hidden secret parenting hack, it's a nappy change harness that attaches to your baby's change table, and allows you to strap baby in during nappy changes. It's a game changer, not only does it prevent baby from rolling away, but it also keeps them safe from the risk of falling from the table.
That concludes our cloth nappy fit guide, with these tips you’ll soon be changing a nappy like a pro.
Meet the Author
Natalie Lassen

Natalie, Founder of NappyLuxe, is an eco-conscious mother and entrepreneur who discovered the benefits of cloth nappies for her family and the environment. With a mission to create the ultimate cloth nappy, she spent years researching and testing various designs before launching NappyLuxe - a range of high-quality, easy-to-use, and ultra-absorbent cloth nappies. Natalie is passionate about sharing her experience and expertise, helping parents make informed decisions and embark on their own sustainable parenting journey.

Get 10% off your first order
Plus get notified about promotions, new releases and journal updates.